
Some say that psoas major is impossible to release on your own.
While that may be true to a certain extent, we believe that perseverance…and a bit of yoga can easily do the trick.
Here are the 7 yoga poses that can help your psoas major release today – check them out!
Besides the infographic right below, this guide also has these:
(if you like this infographic, please share it on your blog with an attribution to MyErgonomicChair.com; happy stretching!)

(if you like this infographic, please share it on your blog with an attribution to MyErgonomicChair.com; happy stretching!)
What Is Psoas Major Muscle Group and What Is Its Function?

The psoas major muscle group is perhaps one of the most important muscles in your body, and it is used in almost every physical activity you do.
Whether you’re running, cycling, dancing or just sitting at your computer, your psoas muscles play a vital role in how you accomplish the task.
In fact, without the psoas major muscle group, you wouldn’t even be able to stand up.
Your psoas major muscles join your upper and lower body together and help stabilize your spine, which is why it is the single most important structural muscle in the human body and is vital in controlling the body’s major movements.
The psoas major muscles attach from the vertebrae, through the pelvis and then attach to the femurs, which means they are the only muscles in the human body which connect your spinal column to your legs.
Here is a nice little video that will help you understand what it is, its origin, insertion, action and innervation.
Check it out!
What Is Psoas Syndrome?
Psoas syndrome is a problem relating to an imbalance of muscle function.
A weak psoas muscle can be the cause of many aches and pains in other parts of the body.
Why is this so?
Because when your psoas muscles are weak, it causes the other muscles around it to work harder to compensate for this weakness. This leads to overuse of these muscles, causing pain in areas such as the lower back, neck, and pelvis, or difficulty in standing fully erect without pain radiating down one or both legs.
Taking good care of this deep-seated core muscle is very important in maintaining a strong, pain-free body.
A strong psoas major muscle group allows you to:
- Maintain a healthy posture and strong lower back
- Perform better in sports and while performing routine, daily activities
- Have a less painful pregnancy
A weak, tight psoas major muscle group causes problems such as swayback, knee pain, and sacroiliac joint pain.
Because these sorts of problems are relatively common, and potentially caused by other things, psoas syndrome is often misdiagnosed.
When psoas syndrome manifests as lower back pain, for example, it might not be recognized as the cause of the pain.
When the psoas muscle is injured with a tear, stretch or rupture, this causes a variety of aches and pains.
The good news, though, is psoas syndrome can easily be treated with careful exercise.
Here is a bit more details on the psoas syndrome, bursitis, & tendonitis:
8 Great Exercises for Psoas Release
It is very important to exercise the psoas major to ensure it is maintained well and kept healthy.
Below are 8 great exercises and stretches which you can perform right at home.
1: Leg Lifts
While lying flat on your back, extend your legs in front of you and place your hands underneath your bottom. With your back firmly flat against the floor, lift your leg above the ground and hold for five seconds.
Perform eight to twelve repetitions on each leg.
2: Thomas Stretch
Perch yourself on a high and sturdy surface such as a table, and allow your thighs to rest half-way off it. Grab one knee and pull it to your chest, let the other leg hang freely from the surface and then lean back until your lower back is flat on the surface. Hold for 30 to 60 seconds and repeat three repetitions on each side.
3: Kneeling Lunge
Kneel on one knee with your frontal-most leg at a 90-degree angle, tuck in your pelvis and gently lunge forward while keeping your back straight. Hold the lunge for thirty seconds and complete 3 to 5 repetitions on each side.
4: Leg Throws
Lay flat on your back with your legs extended above your waistline and have a partner forcefully push your feet forward. Your legs will arc towards the floor in response to this – allow it, but slow your legs down and stop them completely before they touch the floor. Lift your legs back up and repeat this three to five times on each side.
5: Hanging Leg Lifts
Hang from a pull-up bar which is positioned at a height which prevents your feet from touching the floor when fully extended.
With your hands shoulder-width apart and your feet together, flex your hips and knees simultaneously and pull them up as high as possible before gently returning to the starting position.
Repeat 3 to 5 times.
6: Standing Gate Openers
Lift your right foot and flex your right knee, pulling it towards your chest.
With your thigh parallel to the ground, swing your knee to the left, across the center of your body, and then to the right, opening your hip as much as you can.
Go back to the starting position and then do the same with your left leg.
Do three to five repetitions on each side.
7: Sit-ups
Lay flat on your back and bend your knees, placing your feet flat on the floor.
Interlock your fingers behind your head and curl your upper body up from the mat, then gently lower it back down.
8: Psoas Release Ball
This exercise involves the use of a small, firm ball, such as a tennis ball or a specially designed massage ball.
Lying face down on the ground, place the ball between your abdomen and the floor, positioned halfway between your belly button and hip bone.
Take a deep breath in and rest your body weight on your hands, flat on the floor, while raising your upper body slightly.
Hold the position and take several deep breaths before returning to the floor.
Rise back up, but this time rest your body weight on your forearms and elbows while pulling yourself forward and lifting a leg up on the same side of the body as the ball and then return to the floor.
The entire process should take at least two minutes if done correctly.
Repeat on the other side of your body.
4 Tips for Maintaining Healthy Psoas Muscles
Your psoas muscles can easily become imbalanced by many everyday activities and unhealthy habits.
There are many signs that you may have a psoas muscle imbalance, but there are more common signs which are usually associated with psoas muscle imbalance.
Knee and lower back pain are the most common, and if you find you have these pains with no obvious cause, it may be coming from the psoas muscles.
For ladies, menstrual cramps are another sign of psoas muscle imbalance, as it places additional pressure on the female reproductive organs.
There are also less obvious signs such as a feeling of exhaustion, difficulty in breathing and postural problems because of your pelvis being pulled into an anterior tilt.
Getting your psoas muscles back in check and re-balanced will provide you with long-term pain relief and improve your general wellbeing.
Tip 1: Avoid Constant Extreme Exercise
Sprinting, power walking, high-intensity weight lifting and lots of intense core exercise can have adverse effects on the psoas major muscle.
If you undertake lots of extreme exercise, consider alternating between extreme and light exercise routines.
Tip 2: Do Not Sit in Office Chairs for Long Periods
Let’s face it – sitting is unavoidable. If you absolutely must sit for an extended period (e.g., for work) adopt a good posture and avoid chairs without lower back support. Get up and go for a walk every hour or so.
Additionally, consider buying even a cheap ergonomic chair which is designed to promote a good posture and place less strain on your muscles. You can easily get one even on a budget.
Tip 3: Get a Massage
Tight psoas muscle can be relieved through massage. You can either opt to see a professional massage therapist or practice some self-massage techniques.
Tip 4: Take Breaks When Driving Long Distances
If you are driving far, stop every two to three hours for a stretch and a walk around.
For added benefits, add some support to your car’s seat by placing a rolled-up towel or cushion at the base of your spine.
How to Massage Psoas Muscle
The psoas muscle is usually the cause of lower-back and thigh pain due to it being overly tight or having trigger points. But, these trigger points can be released through self-massage.
To be able to massage your psoas muscle, you must adopt an exercise or position where you can feel the muscle – this depends on the individual, but the easiest way is to lie down.
When you have found the psoas muscle, begin searching for tender spots where you feel pain and start massaging it slowly, for a maximum of fifteen strokes, with your fingertips.
Make sure your massage strokes are slow and short, applying a fair amount of pressure, but do not over-massage or apply too much pressure, because you could cause injury.
It is always worth seeing a massage professional before attempting a self-massage, as they are the best-placed people to guide you on a bespoke massage technique.
Having said this, there is a way to self-massage the psoas yourself. See how to do it in less than 4 minutes below:
https://youtube.com/watch?v=undefined
How to Release Psoas Muscle with Seven Simple Yoga Poses
These poses are great to help wake up the psoas major muscle, activating different parts of it, so it is easier for you to release the muscle.
Pose 1: Constructive Rest Position
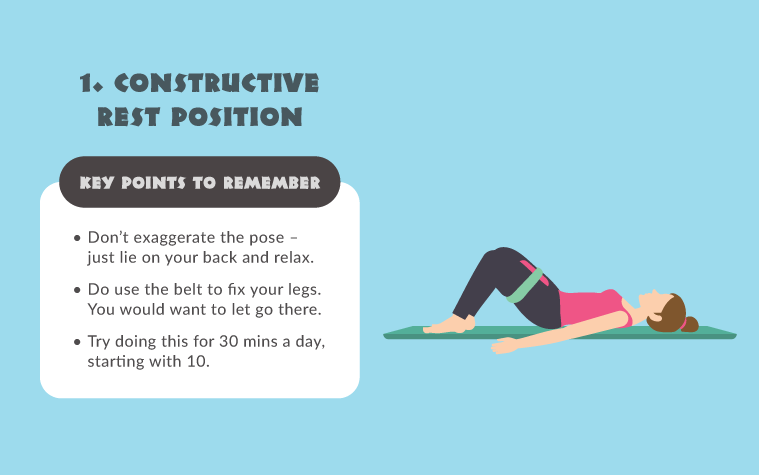
The constructive rest position is a simple position which improves your posture and releases your tension, and it is an excellent position in which to listen to music or read a book.
Lay flat on your back and bend your legs up at a 45-degree angle, ensuring your feet are flat on the floor placed around 12 inches from your bottom.
Tie a belt around the middle of your thigh, and then rest.
Pose 2: Active Supine Stretch
Again, while lying flat on your back, keep your left leg rested on the floor, and then bring your other leg back toward your body, placing your hands on your ankle and keeping it straight.
Pull your upper leg into your stomach and hold.
Pose 3: The Ultimate Stretch
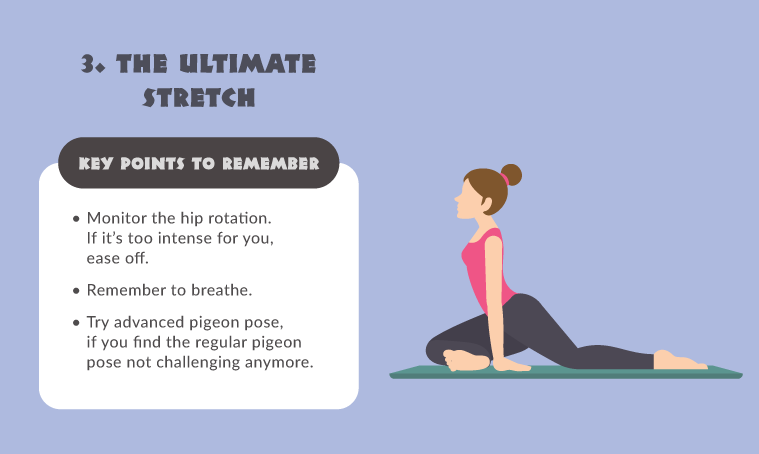
Using your arms to support you, place your palms flat on the floor and lift your body up.
Place your right leg sideways on the floor, as if you were going to cross your legs, and place the front of your left leg flat on the floor, pointing your foot and pushing your left leg as far back as possible.
Keep your left thigh raised off the floor.
Pose 4: Standing Swing
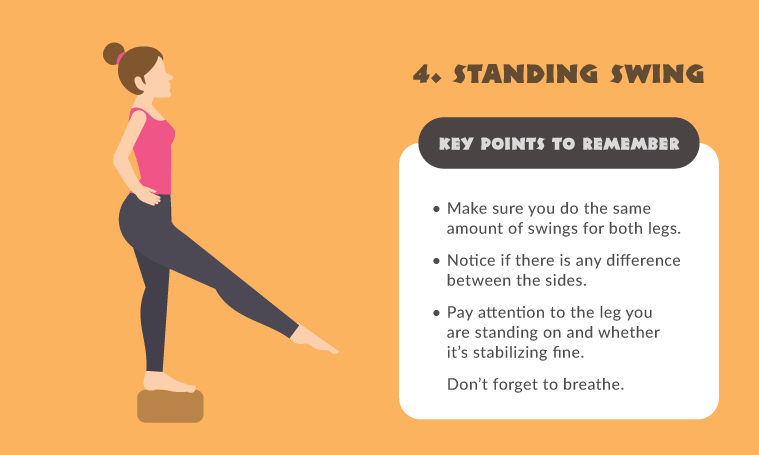
Stand up straight on a yoga block (or something similar) and place your hands on your hips.
Keeping your right leg straight and locked, with your foot pointed, swing it out to your front and then back to the standing position.
Pose 5: Tadasana (Mountain Pose)
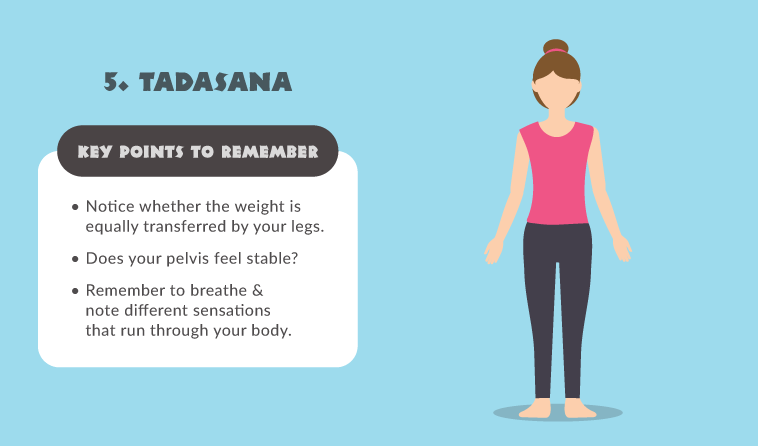
Begin by standing erect, legs slightly apart and your hands hanging down the side of your body.
Ensure your thighs are firm by grounding yourself and then lift your kneecaps, strengthening the arches of your inner ankles as you lift them. Gently turn your upper thighs inward and look slightly upward.
Then breathe in and stretch your arms, shoulders, and chest upwards while raising your heels, placing your body weight on your toes.
Hold it, then release while exhaling.
Pose 6: Vrksasana (Tree Pose)
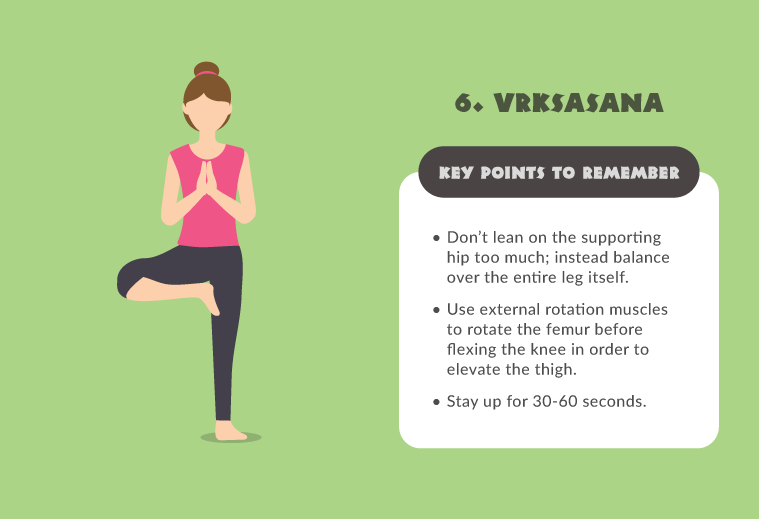
Again, begin by standing erect with your legs slightly apart and your hands hanging freely by your side.
Shift your weight onto your left foot, keeping it form against the floor, and bend your right knee, reaching down and grasping it with your right hand. Then, bring your right foot up and place its sole against your inner left thigh.
Rest your hands on your pelvis and then firmly press the sole of your right foot against the inner thigh, and resist it with your left leg.
Press your hands together in Anjali Mudra and focus on a fixed point in front of you.
Hold it for up to one minute before exhaling and emerging back into the standing position.
Pose 7: Parivrtta Utthan Pristhasana (Twisted Lizard Pose)
Begin in a downward-facing dog pose. Bring your left leg forward and place the left foot on the outer side of your left palm and then place both of your forearms on the floor.
Lower your right knee to the ground while stretching back as far as possible, then bend your right forearm so that your fingers point to the left, then bring your left hand up and hold the toes on your right foot.
Remain in this pose for one minute before repeating the pose on the other side, starting on your right leg.